when your device comes from Apple, it comes with a firmware pre-installed. If Apple is no longer signing that firmware, you wouldn't be able to save the SHSH blobs in the past. With ih8sn0ws new tool, you can dump the SHSH blob directly from your currently installed firmware. The way this works is that Apple has signed image files that show up during the boot sequence with the SHSH blob. iFaith allows you to dump your SHSH key directly from those files.
After you have dumped the files, you then patch the firmware file you are trying to downgrade to with your SHSH key, this firmware file is considered a signed firmware file. Once you have created it, you simply restore it in Pwned-DFU mode just like you would if you were restoring any other custom firmware. iFaith is compatible with mostly all iDevices except for the iPad2 and a few others.
Download iFaith-v1.2.1
These are instructions on how to dump the SHSH of your current firmware even if Apple is not signing.
For instance, you can dump the SHSH of the current firmware on your device, so long as the device is susceptible to the Limera1n jailbreak (Everything but the iPad 2) Apple does not have to be signing the SHSH in order for you to dump the blob.
*Note the iPod Touch 2G and iPhone 3G will not work since they will always be jailbreakable. The iPad 2 will not work because it is not susceptible to Limera1n. A jailbreak is not needed for this.
iFaith v1.2.1 Release Notes:
* Added iPod Touch 2G Dumping capability (MC-Model users recommened)
* IPSW Creation for iPod Touch 2G is still a work in progress.
* Fixed exe compression issues (resulting in many DFU loops on IPSW creation).
* Fixed any Windows XP issues.
* Source code coming soon to a github near you!
* It is currently not possible to add iPad 2 support.
Step One
Extract the downloaded rar file, and double click the iFaith.exe file.
Step Two
A disclaimer will appear. Read the notice and click ok to proceed.
Step Three
Click the Dump SHSH Blobs button

Step Four
Read the information and click Proceed when you are ready.

Finally, click the Let's Go! button to start the dumping process

Step Five
If you are dumping an Apple TV 2, indicate it when iFaith asks you
Step Six
Follow the DFU Instructions to place your device in DFU Mode. You can find more on entering DFU mode here.

Press Power and home for 10 Seconds

Release the power button, but keep holding the Home

Once Successful, iFaith will dump the SHSH of your current firmware. It will go through each step which could take a few minutes.

Step Seven
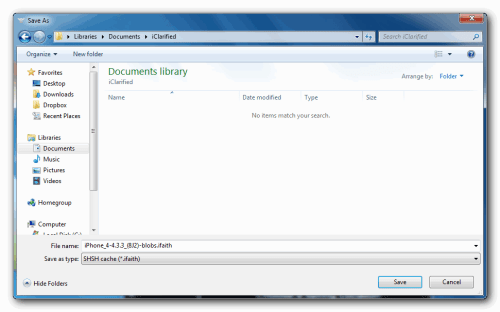
When completed, iFaith will ask you where to locally save the SHSH.

Indicate where you want to save the SHSH file.
Step Eight
iFaith will notify you that the process was successful
After you have dumped the files, you then patch the firmware file you are trying to downgrade to with your SHSH key, this firmware file is considered a signed firmware file. Once you have created it, you simply restore it in Pwned-DFU mode just like you would if you were restoring any other custom firmware. iFaith is compatible with mostly all iDevices except for the iPad2 and a few others.
Download iFaith-v1.2.1
These are instructions on how to dump the SHSH of your current firmware even if Apple is not signing.
For instance, you can dump the SHSH of the current firmware on your device, so long as the device is susceptible to the Limera1n jailbreak (Everything but the iPad 2) Apple does not have to be signing the SHSH in order for you to dump the blob.
*Note the iPod Touch 2G and iPhone 3G will not work since they will always be jailbreakable. The iPad 2 will not work because it is not susceptible to Limera1n. A jailbreak is not needed for this.
iFaith v1.2.1 Release Notes:
* Added iPod Touch 2G Dumping capability (MC-Model users recommened)
* IPSW Creation for iPod Touch 2G is still a work in progress.
* Fixed exe compression issues (resulting in many DFU loops on IPSW creation).
* Fixed any Windows XP issues.
* Source code coming soon to a github near you!
* It is currently not possible to add iPad 2 support.
Step One
Extract the downloaded rar file, and double click the iFaith.exe file.
Step Two
A disclaimer will appear. Read the notice and click ok to proceed.
Step Three
Click the Dump SHSH Blobs button
Step Four
Read the information and click Proceed when you are ready.
Finally, click the Let's Go! button to start the dumping process
Step Five
If you are dumping an Apple TV 2, indicate it when iFaith asks you
Step Six
Follow the DFU Instructions to place your device in DFU Mode. You can find more on entering DFU mode here.
Press Power and home for 10 Seconds
Release the power button, but keep holding the Home
Once Successful, iFaith will dump the SHSH of your current firmware. It will go through each step which could take a few minutes.
Step Seven
When completed, iFaith will ask you where to locally save the SHSH.
Indicate where you want to save the SHSH file.
Step Eight
iFaith will notify you that the process was successful


